 Microcontroler.
Welcome to the second part of the 6 channel global remote control with programmed transponder all ready programmed into the
Microcontroler.
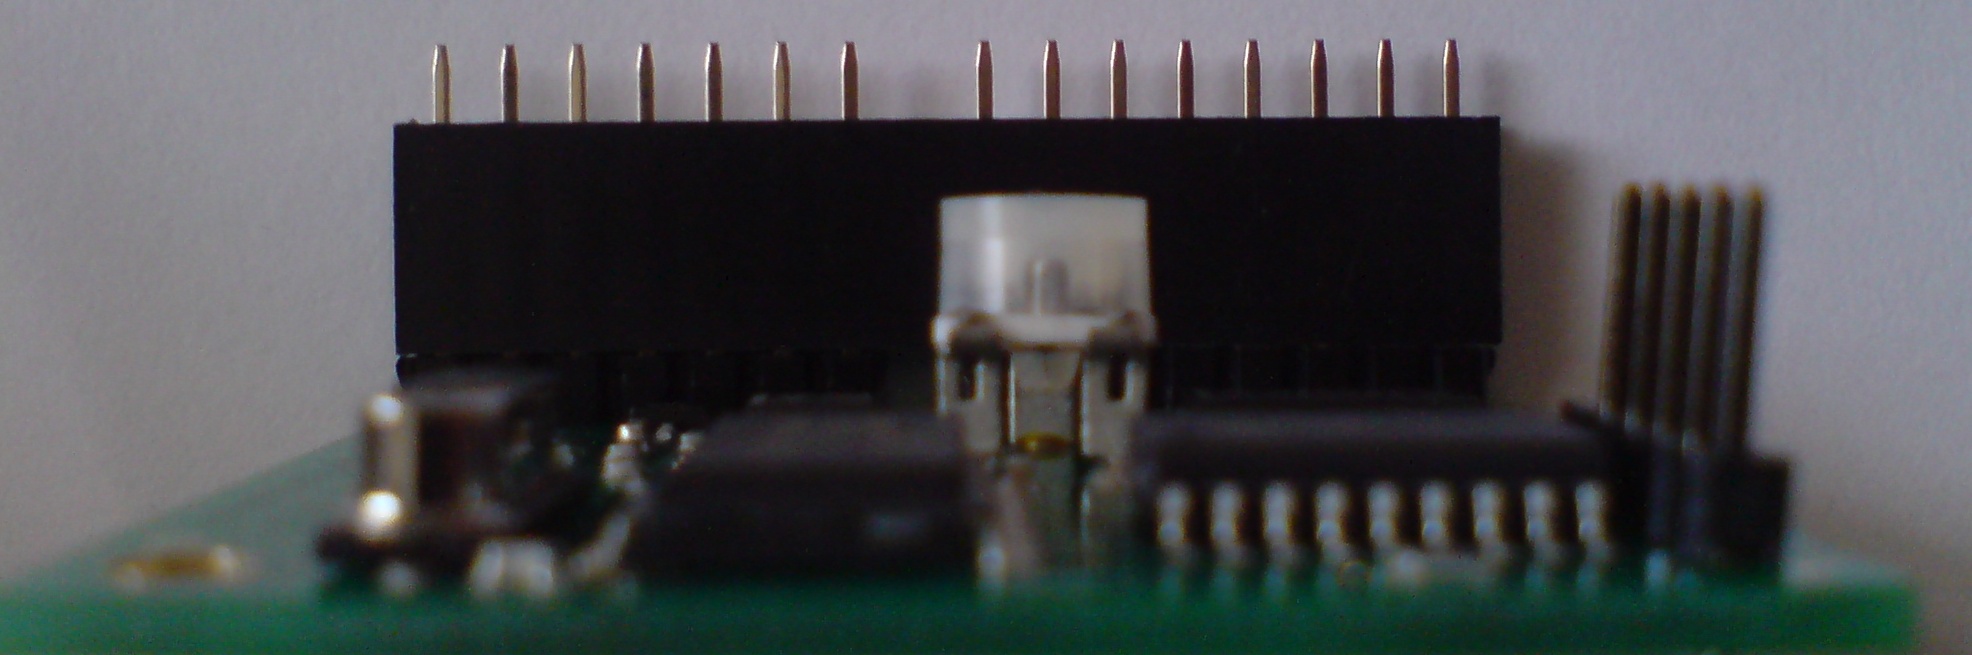
14). In the photo above you can see
the head pins of the SMT DTMF Decoder with transponder on the schematic below
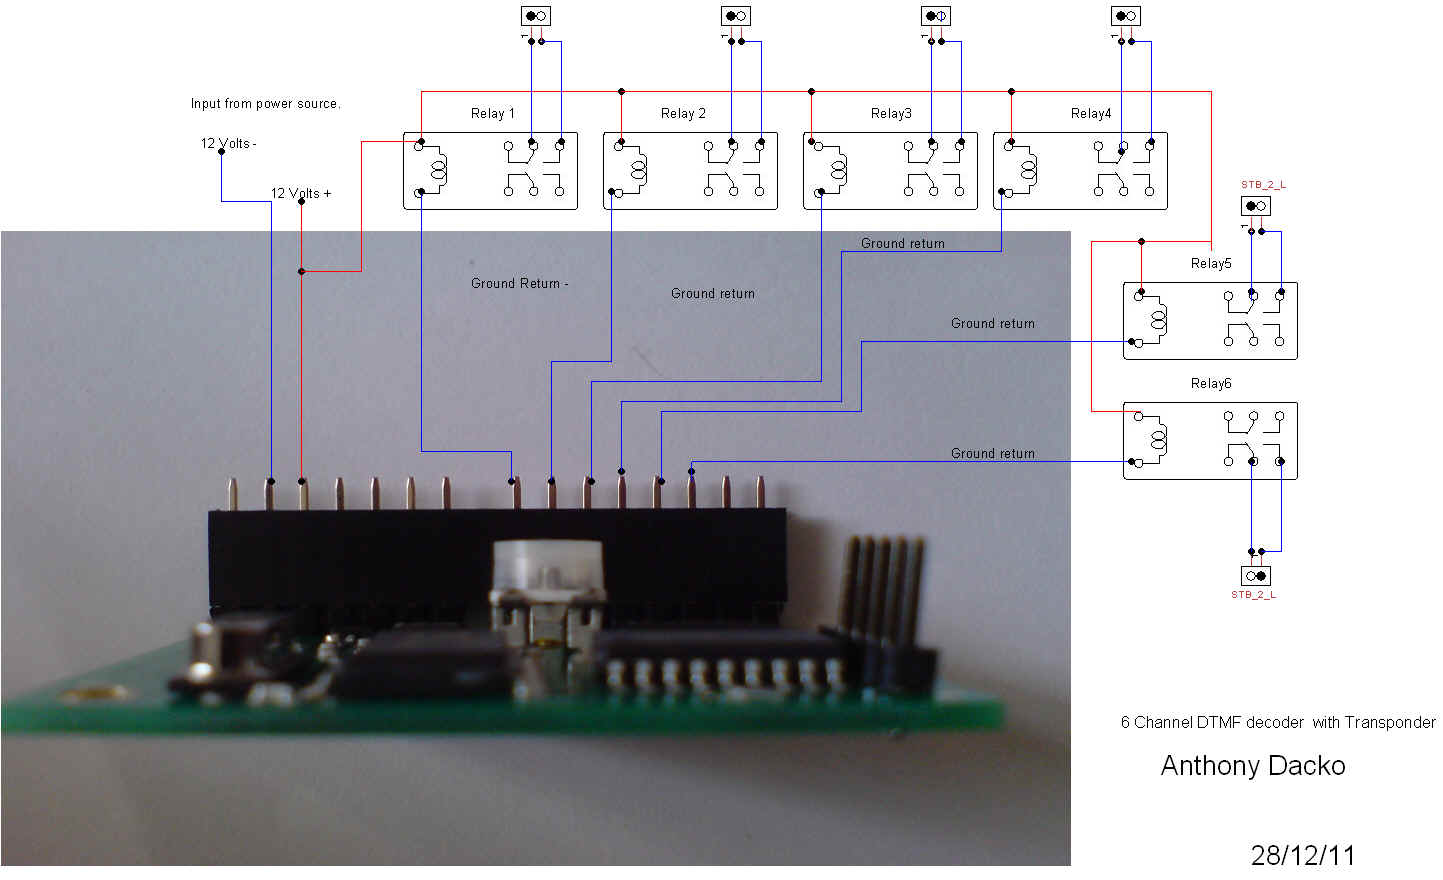
you can see how to wire the power supply up and the relays.
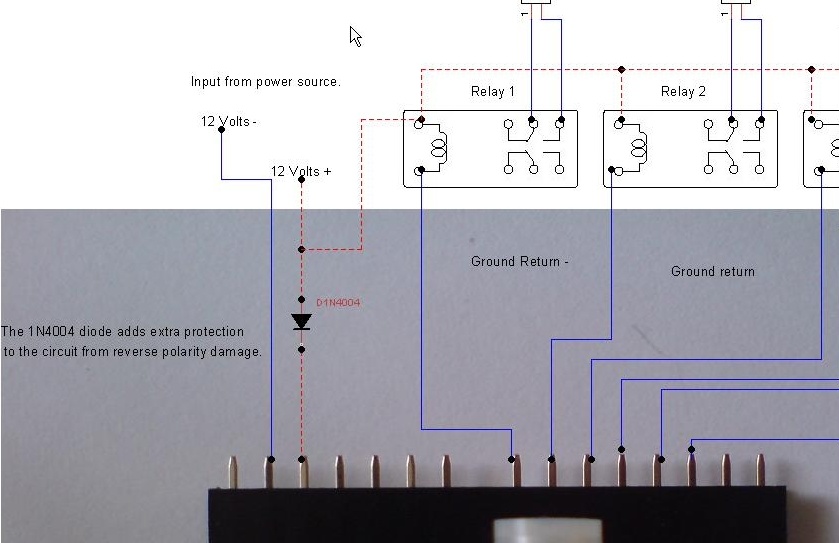
In the photo below you can see I have added a simple diode 1N4004 into the power line of the 12 volt + supply this helps protect the circuit from reverse polarity damage.
Now if you want to add the extra protection diode to your power line this will cost about 10p order the diode from any electronic shop or look on Ebay or order it from Bits box here they do ship international.
15). In the schematic
above you can see how to wire up the relays they follow the same layout as the
first relay just the ground return is one pin along on the decoder each time.
16). Now as
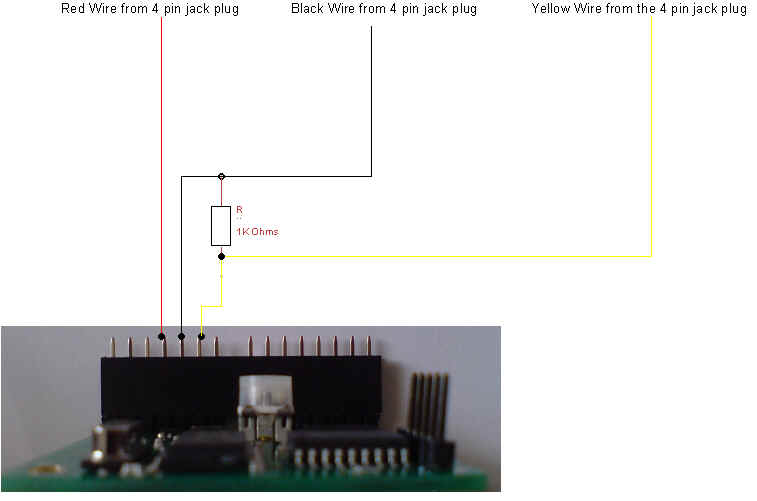
this kit comes with a 4 pin plug and short cable for the Nokia 1208 Mobile phone
you will need to solder the 3 wires to the rest of the DTMF decoders pins see
the schematic below.
17). I have left out the above photo here to make
it simpler to set up so you will find it easer to add the cable to the DTMF
decoder.
18). The 4 pin plug comes with 4 wires we only
need to fix 3 to the Decoder the white wire is not used here you will also need
to add the 1K Ohms resister between the black and yellow wire to act as a load.
19). Now all that is left to do is check your
wiring and if every thing looks ok then test the devise out you should hear a
Morse code tone when the relay switches on and when you switched the relay off.
20).
Now if you want to add LED's to the free contacts on the relay this will
tell you witch relays are on by switching the LED's on for that relay see Schematic
diagram below.
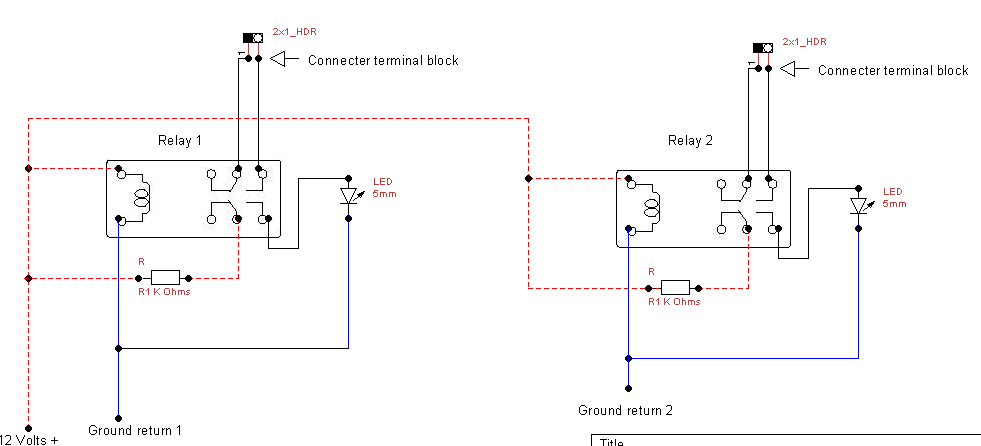
21).
Now in the schematic below you can see how to connect the LED's and
relays up to the DTMF Decoder

22). Now if you have any problems you can e-mail
me: Anthony@anthony-dacko.net