 Remote
Control any thing from 1 to
8 Relay Channels.
Remote
Control any thing from 1 to
8 Relay Channels.Welcome to the Second part of how to build a simple Cell phone to Cell phone Remote
Control any thing from 1 to
8 Relay Channels.

Now if you want a PSTN 8 channel remote control to work with your Land Line click here.
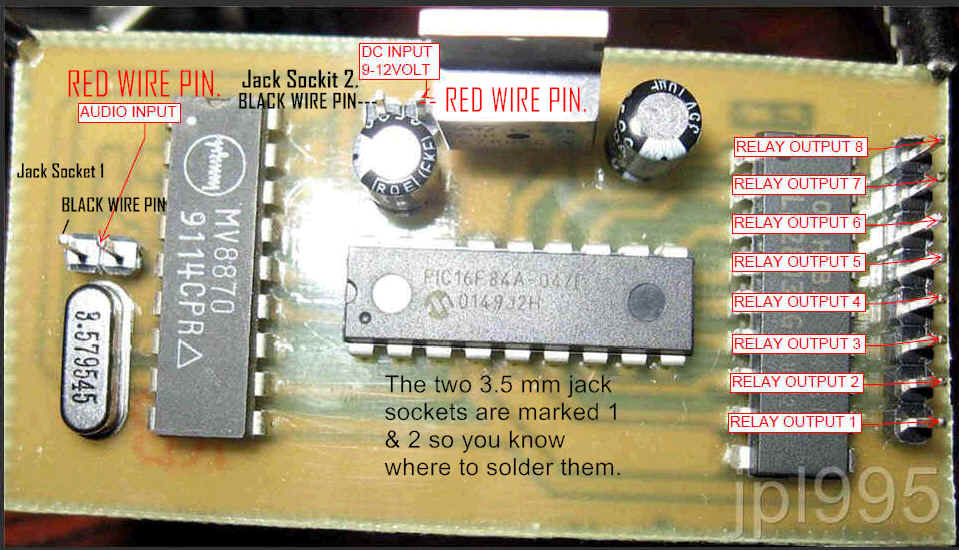
Here you can see how to solder the two wires to the Plug solder one red wire to the bottom of the socket and solder the black wire to the top contact of the socket see photo below do this with both sockets.
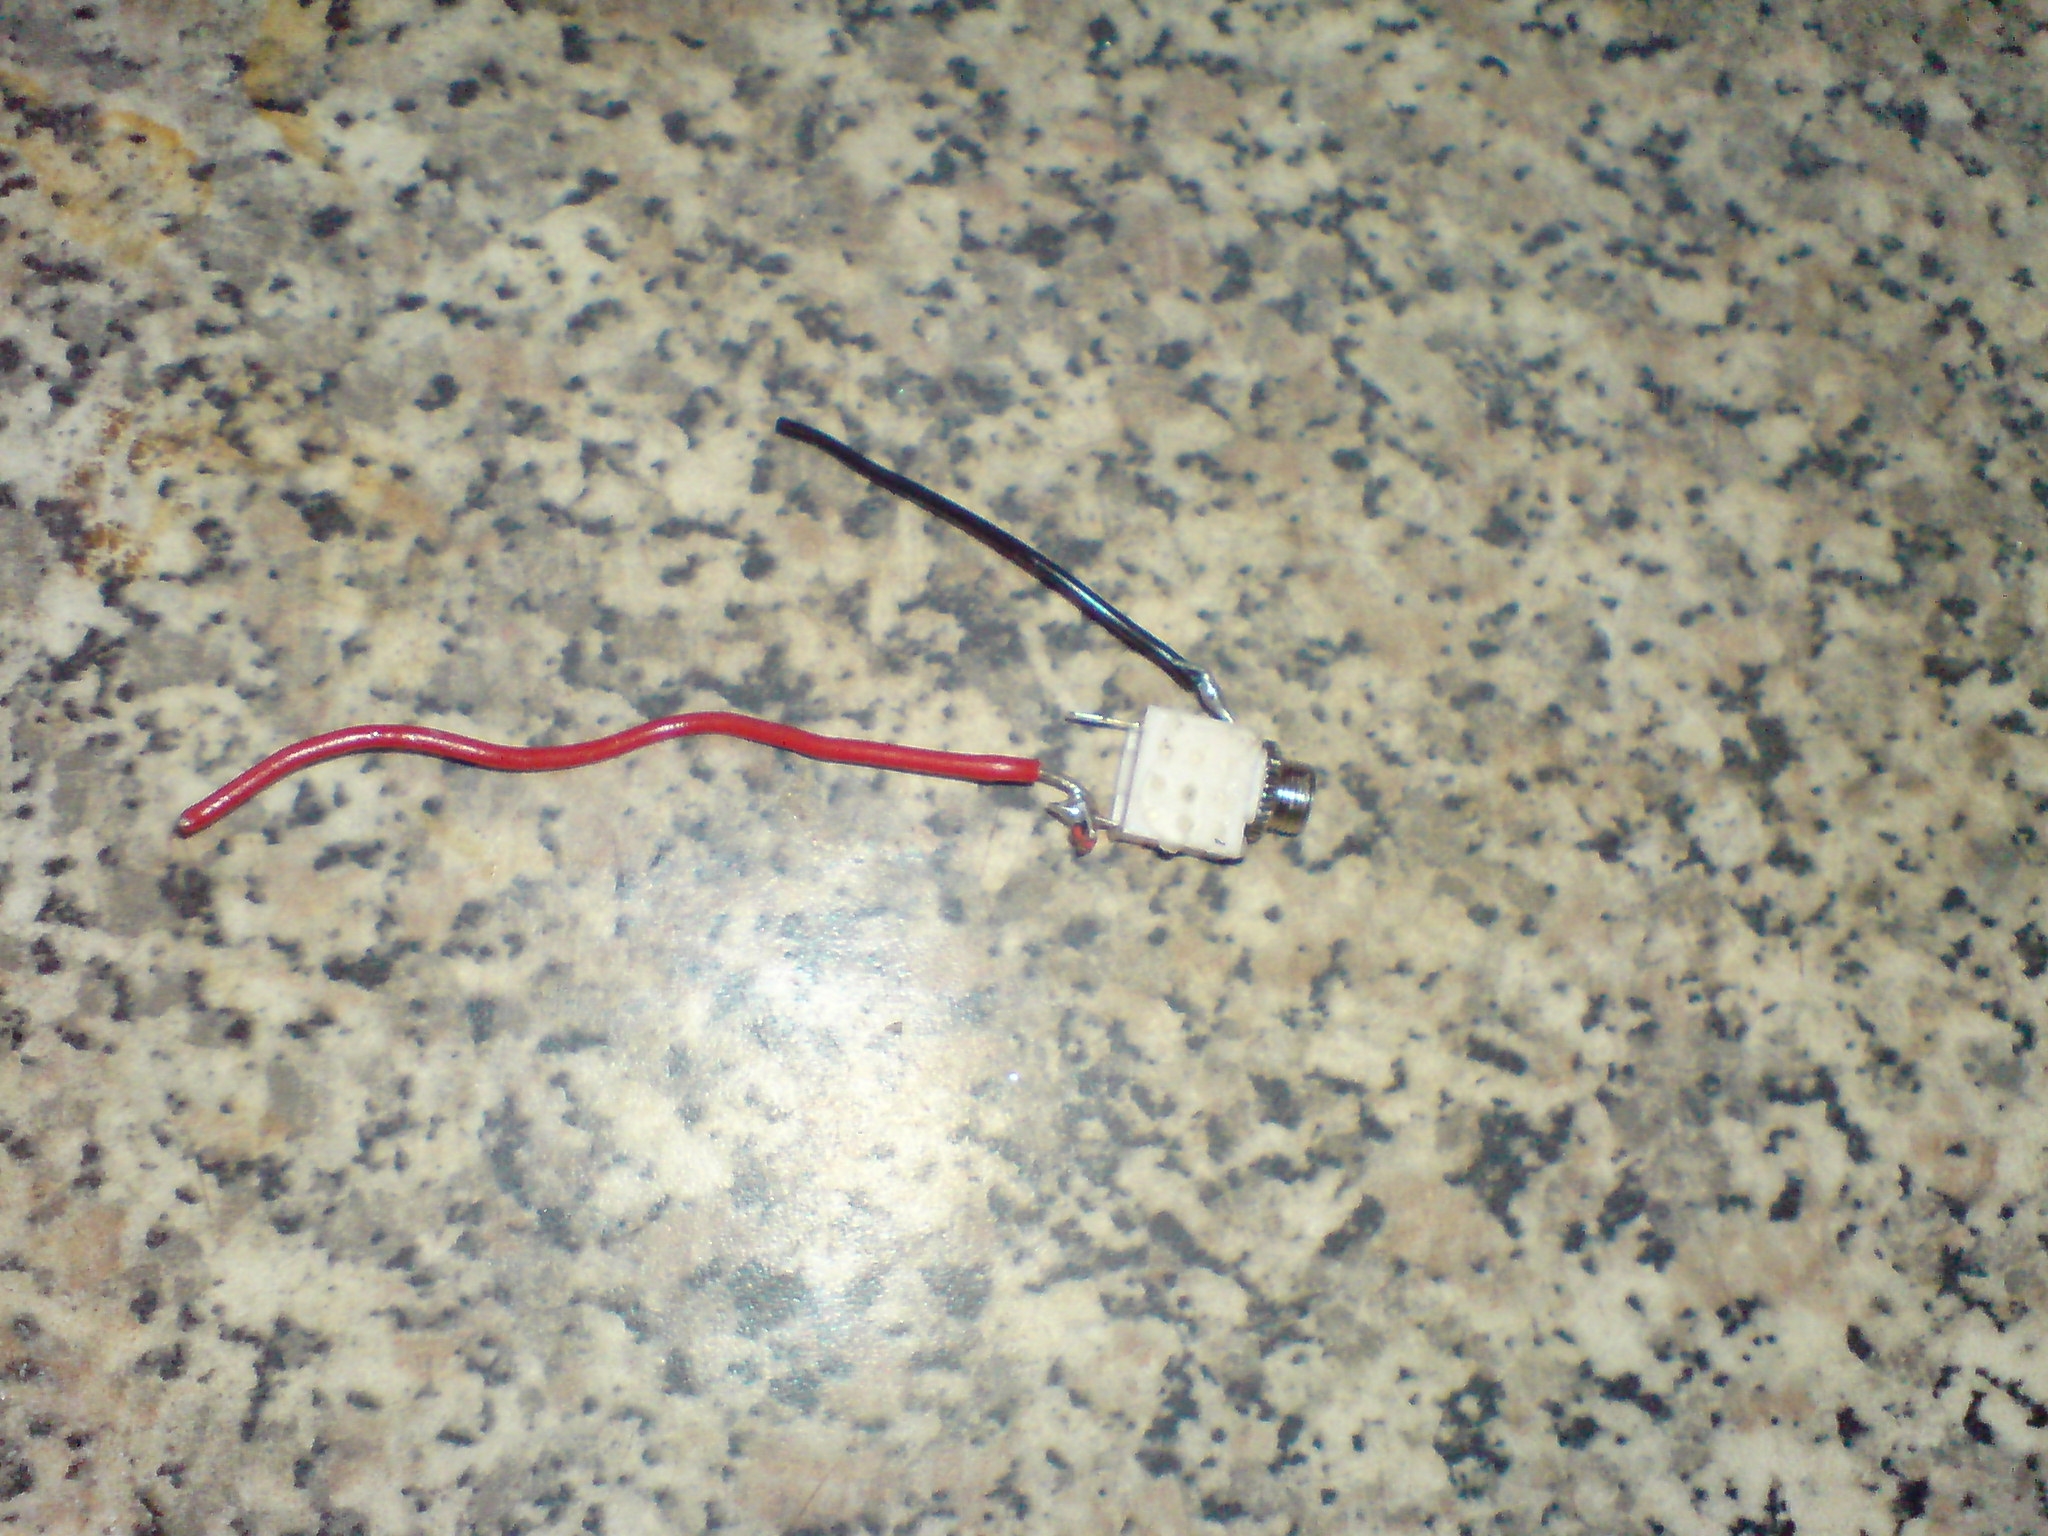
When you have done your two sockets connect the red wire to the + on the Auto input and connect the black wire to the Ground, Earth on the pin next to it.
With your second socket connect the red wire to the + on the DTMF decoder unit and connect your black wire to the pin next to it Ground Earth.
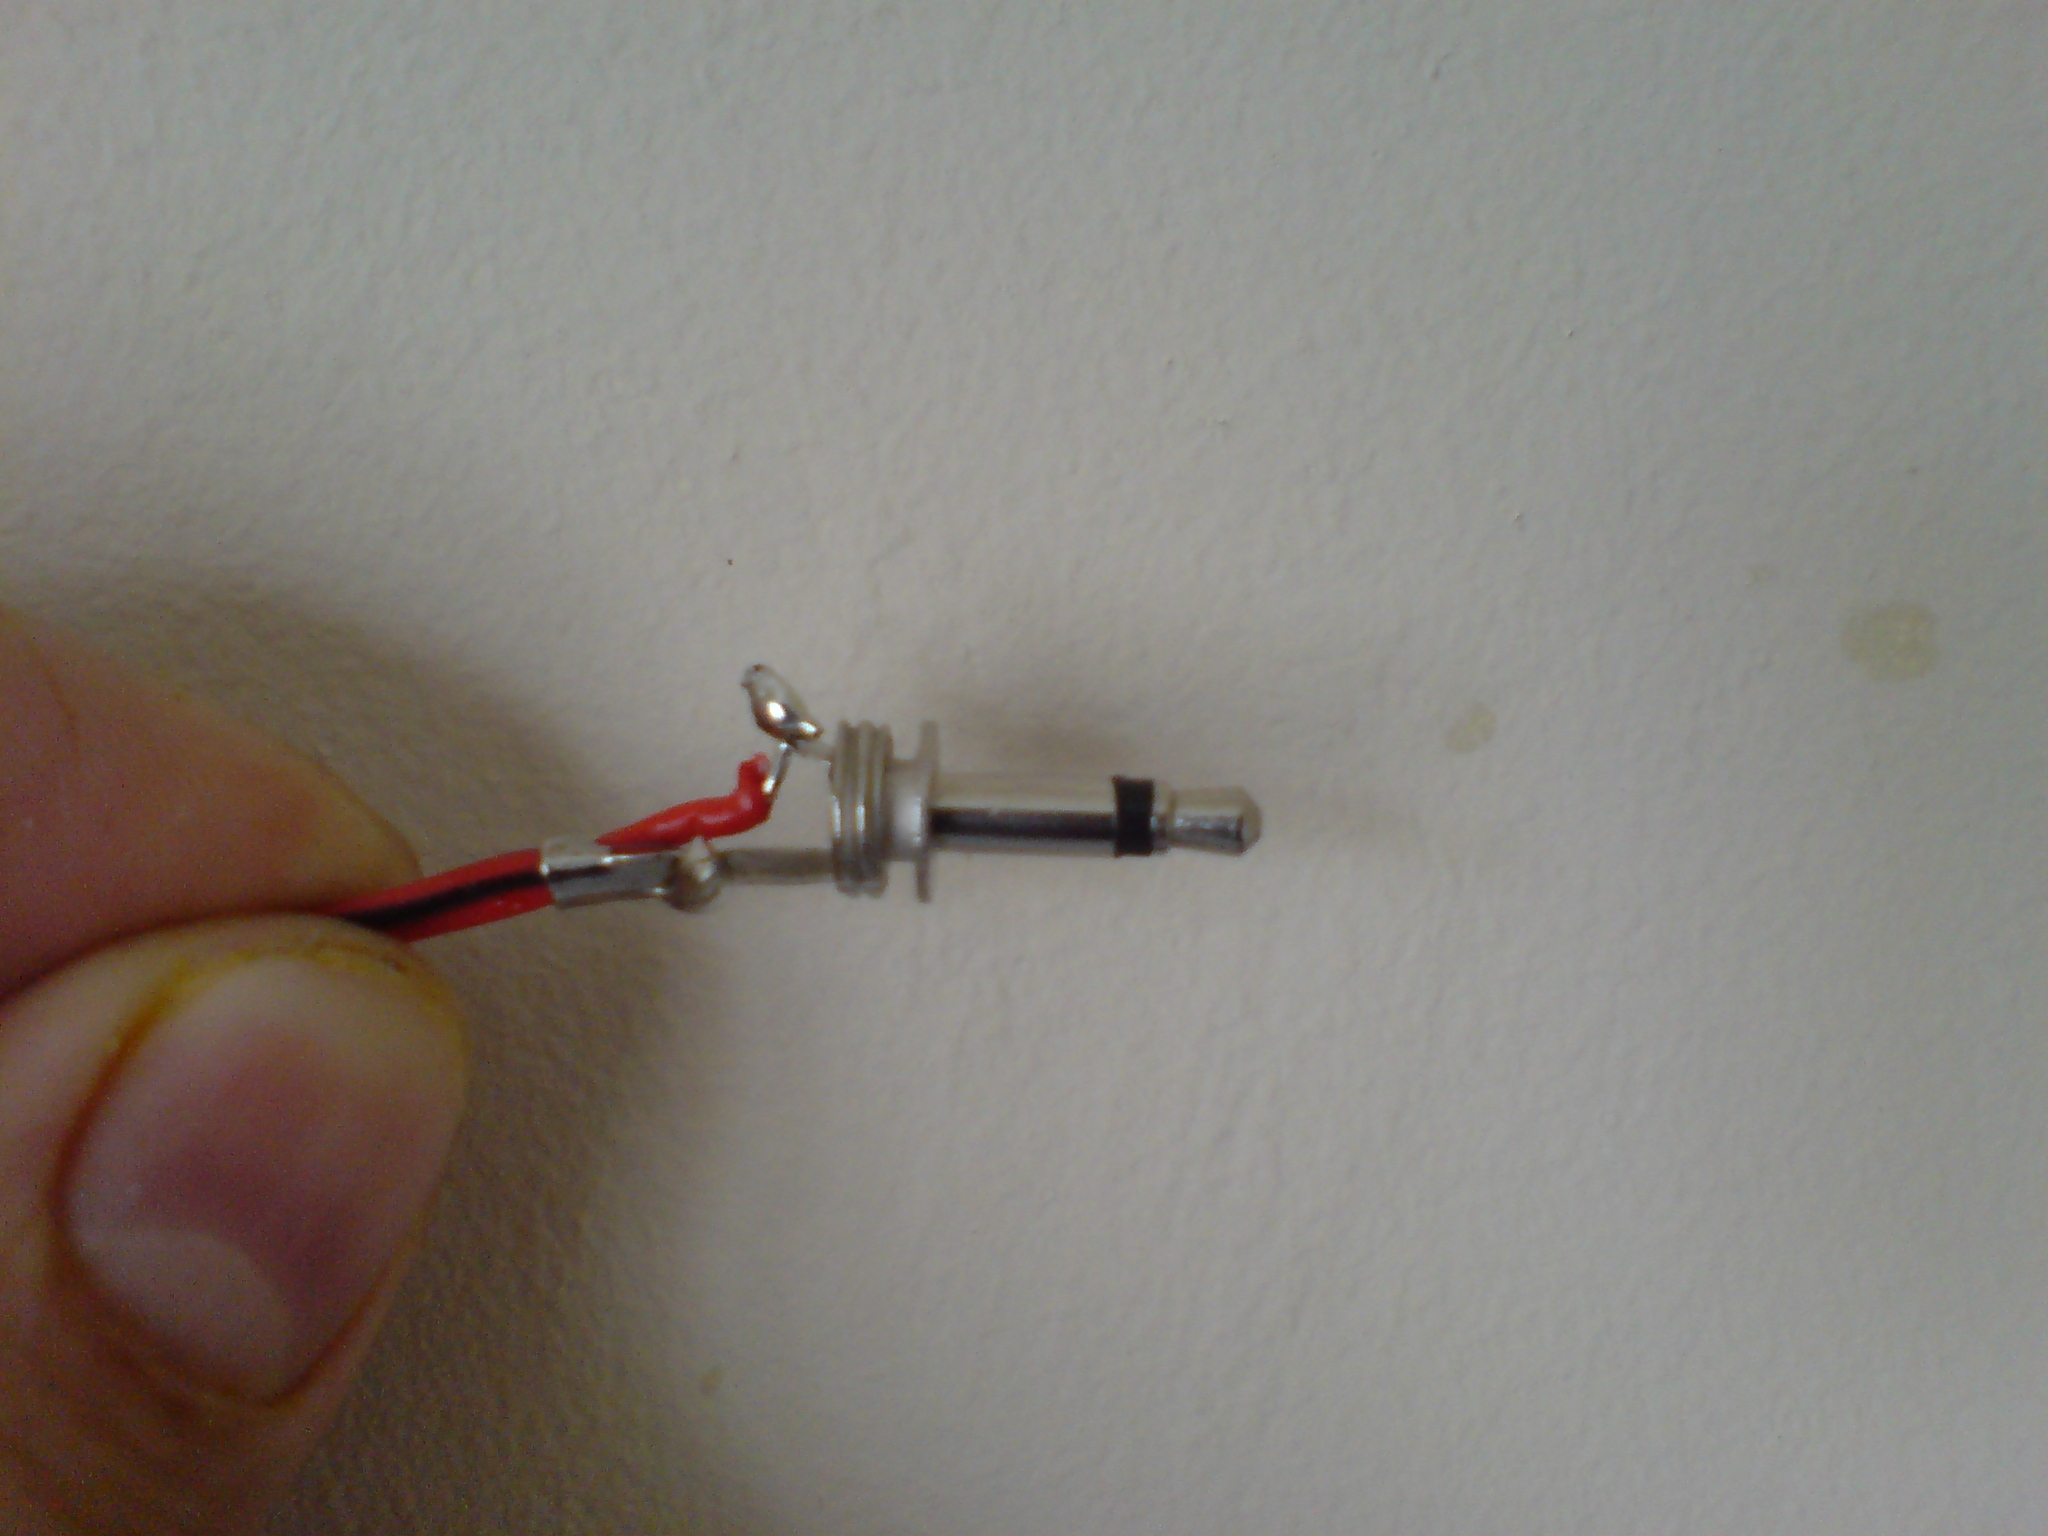
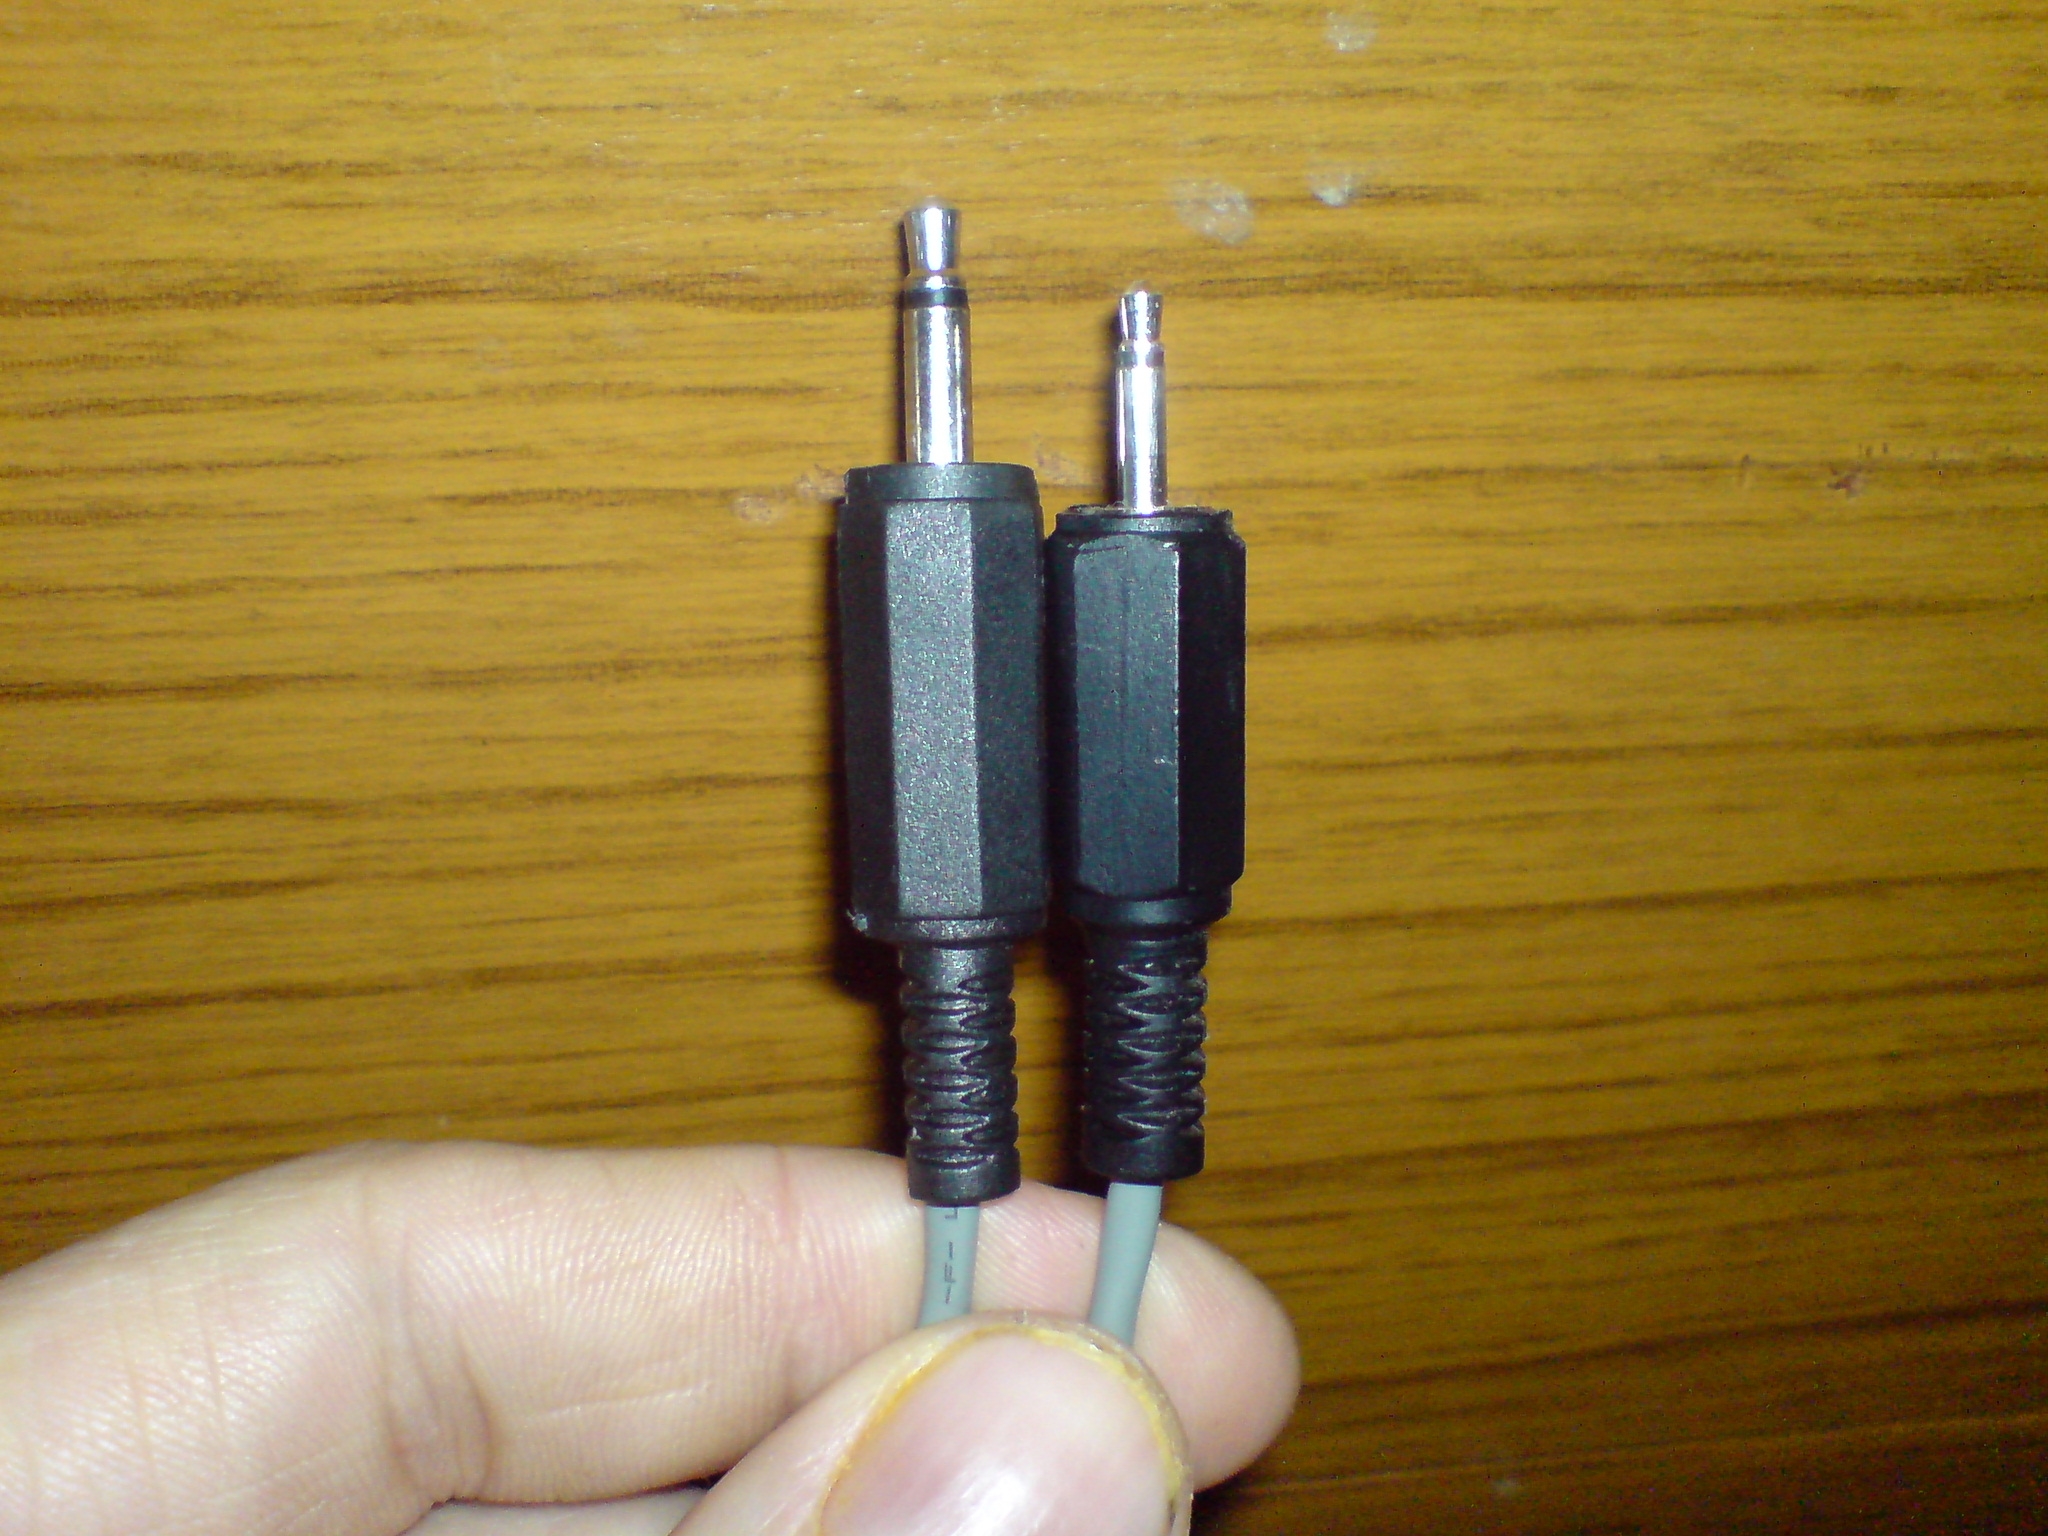
Now when you use the Nokia 1208 Mobile phone this will work with a two pin mono jack plug solder a red wire to the middle contact red and solder a black wire to the ground earth of the jack socket do this with the 3.5mm & 2.5mm jack plugs see photo below.
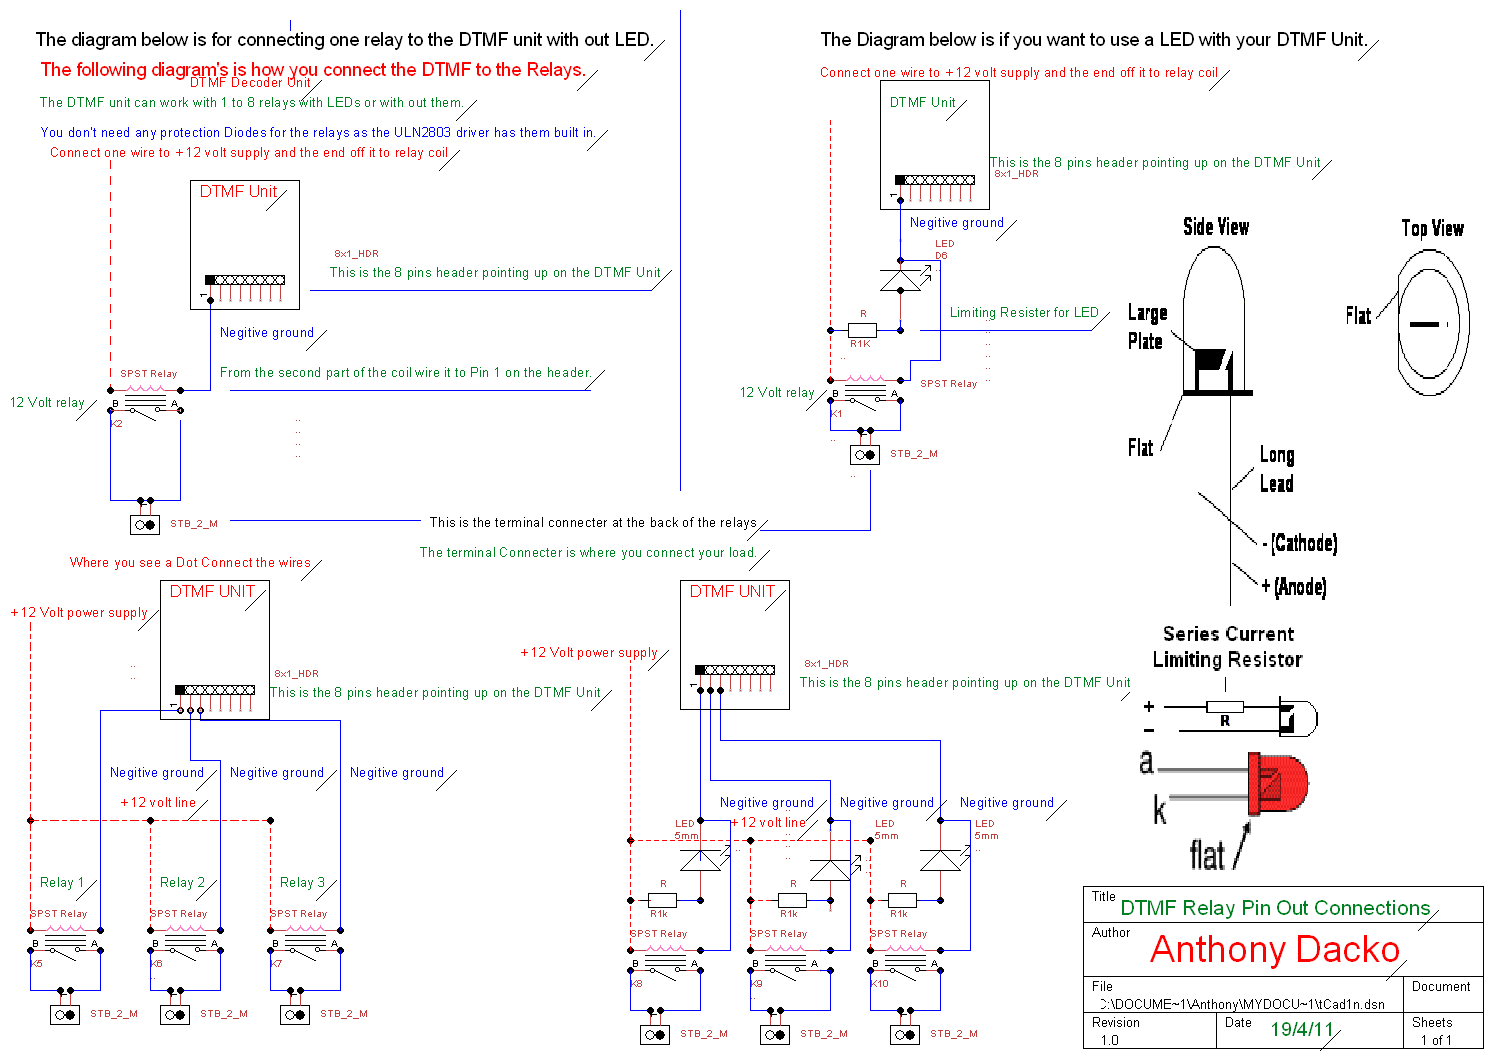
 1). Now I am going to use 8 relays
for this project you can use any thing from 1 to 8 if you like I have also given
my own CAD Schematic Diagram on how to set the relays up to the main DTMF unit.
1). Now I am going to use 8 relays
for this project you can use any thing from 1 to 8 if you like I have also given
my own CAD Schematic Diagram on how to set the relays up to the main DTMF unit.
2). Now as Jim has all ready done a
PDF file for his DTMF the Power and Audio connections I don't need to add photos
here but I have done my own CAD Schematic Diagram to show you how you can
connect the relays in a number of different ways.
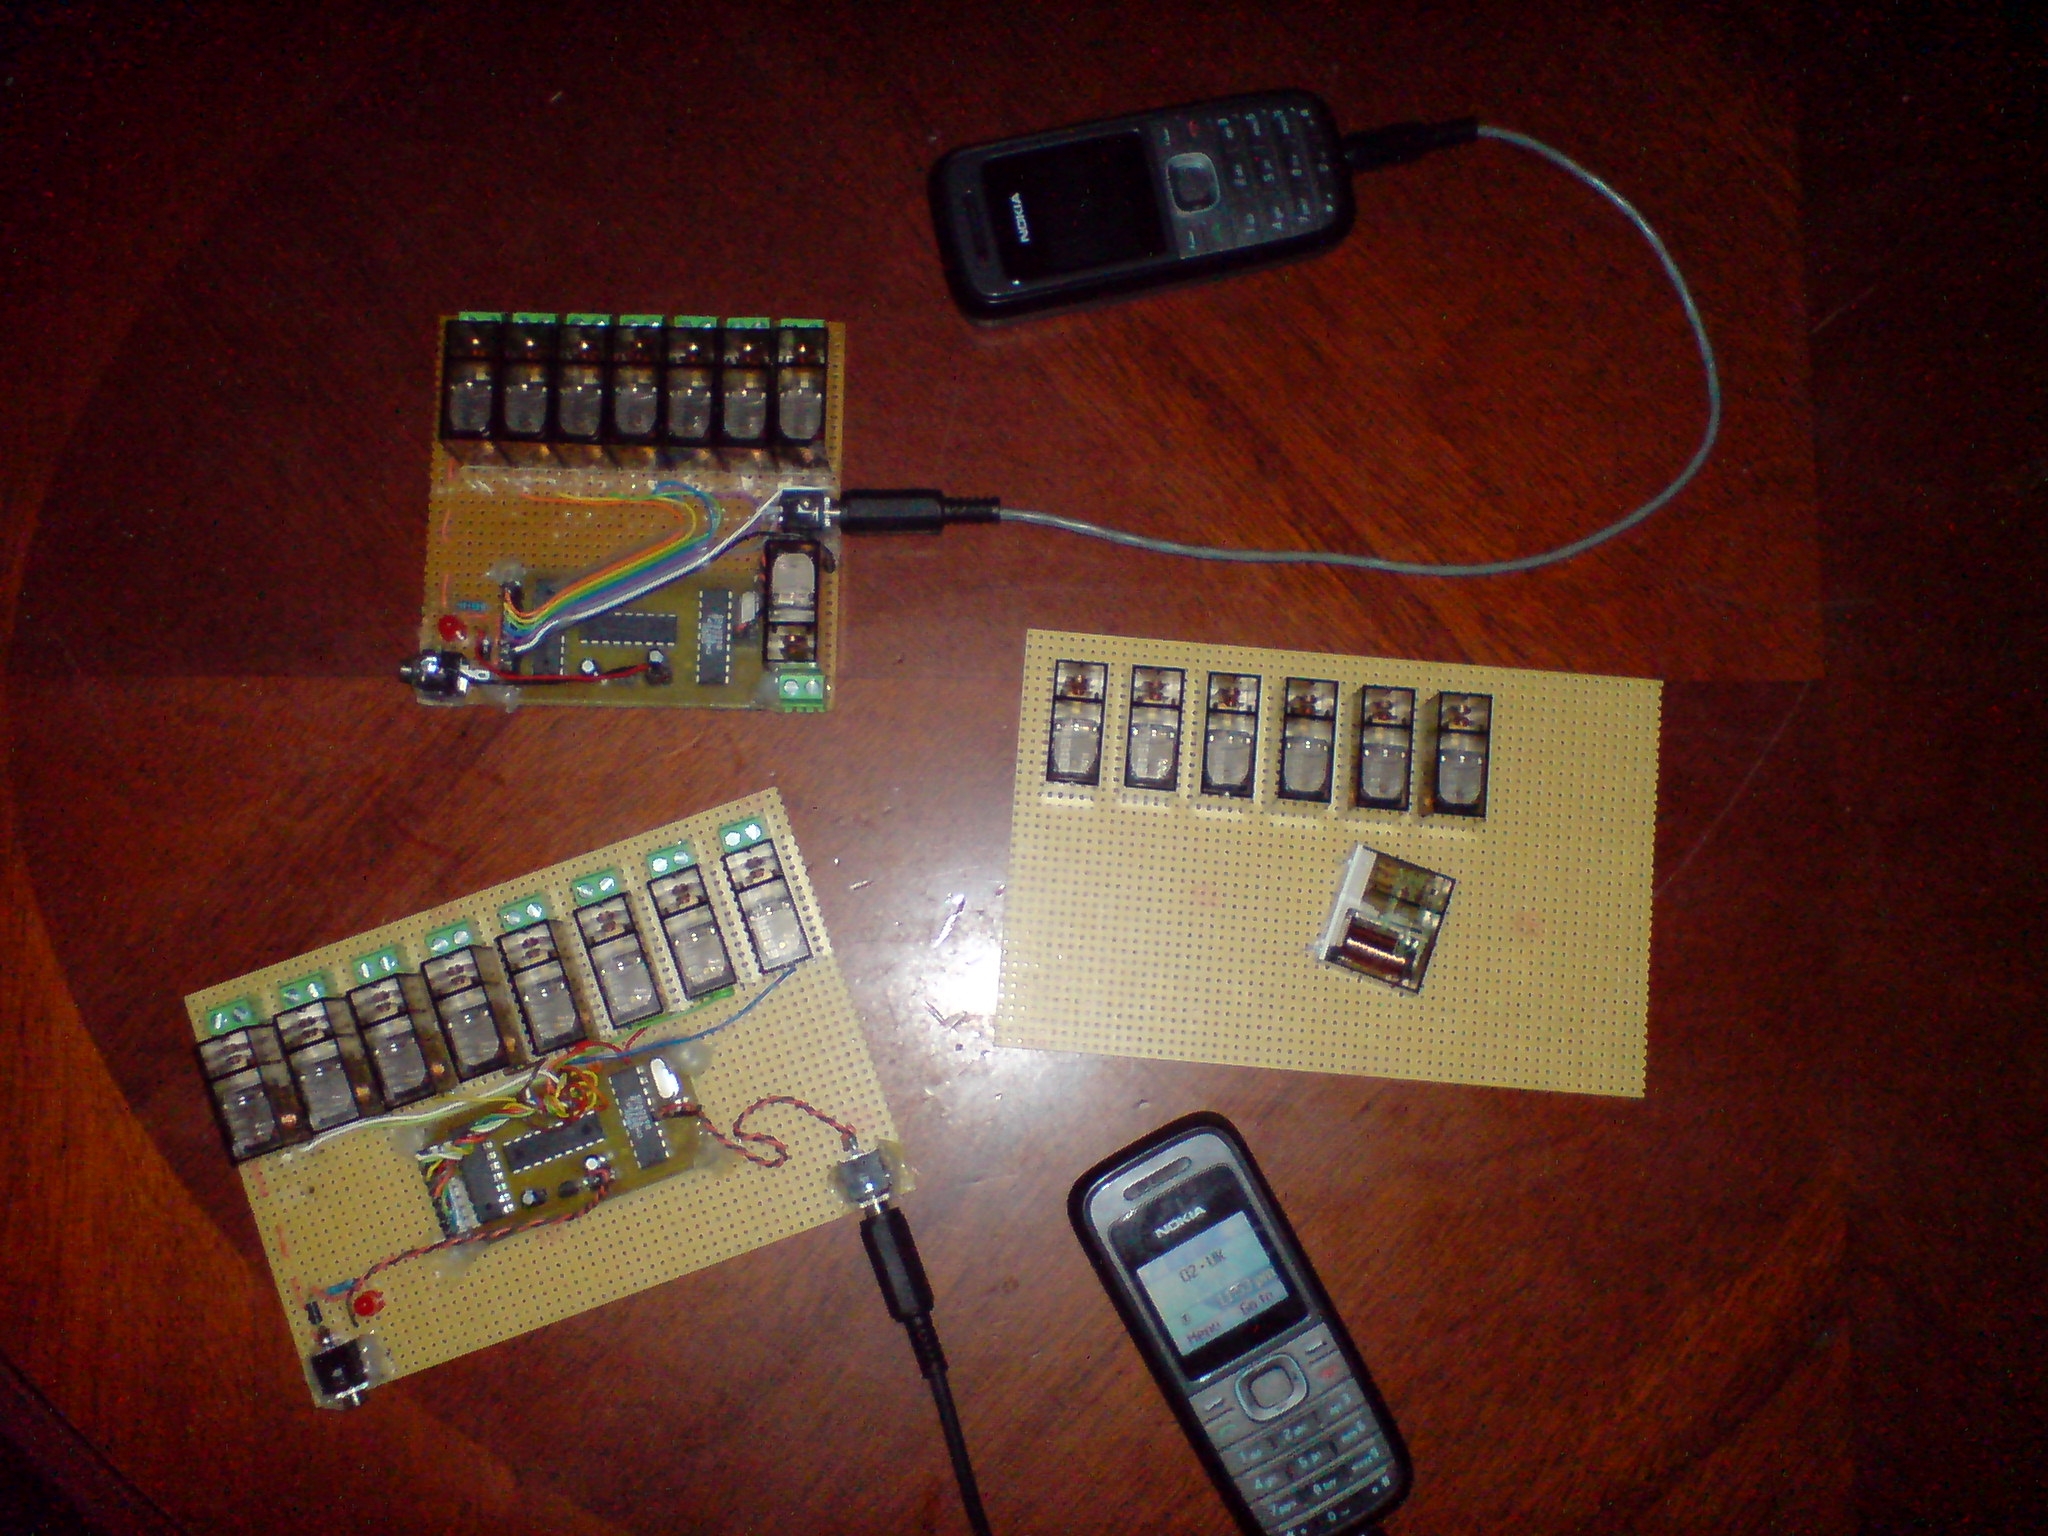
3). Now in the photo below I have
taken a snap shop of the DTMF unit this is very simple to follow as Jim has
Marked the connections on his DTMF unit.
4). I have designed a number of different
ways this DTMF unit can be connected to a relay some with no LED and some with
LEDs and more.
5). I have also shown in my Schematic
diagram how to add more relays for more channels with or with out LEDs.
The Schematic below is how to connect the relays and more.
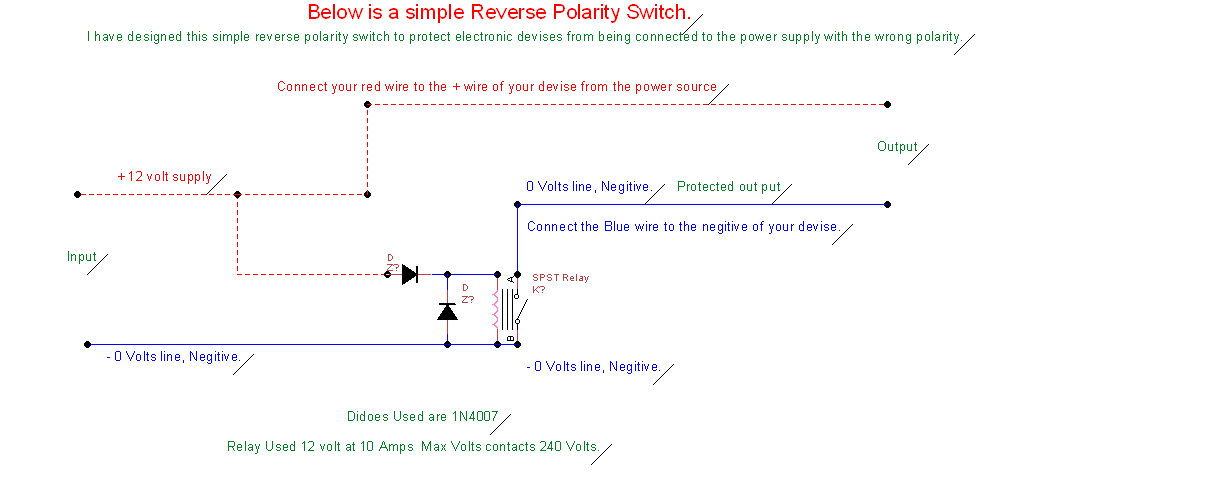
Now I have designed a simple Polarity Protection Switch that will protect your DTMF unit if you connect it up wrong with the power supply click on the photo below.
Please all so note the DTMF unit will work with or with out this switch this is just to add a little more protection.
Now if you would like to see the simple Opposite Polarity Protection Switch working then visit my You Tube page here..
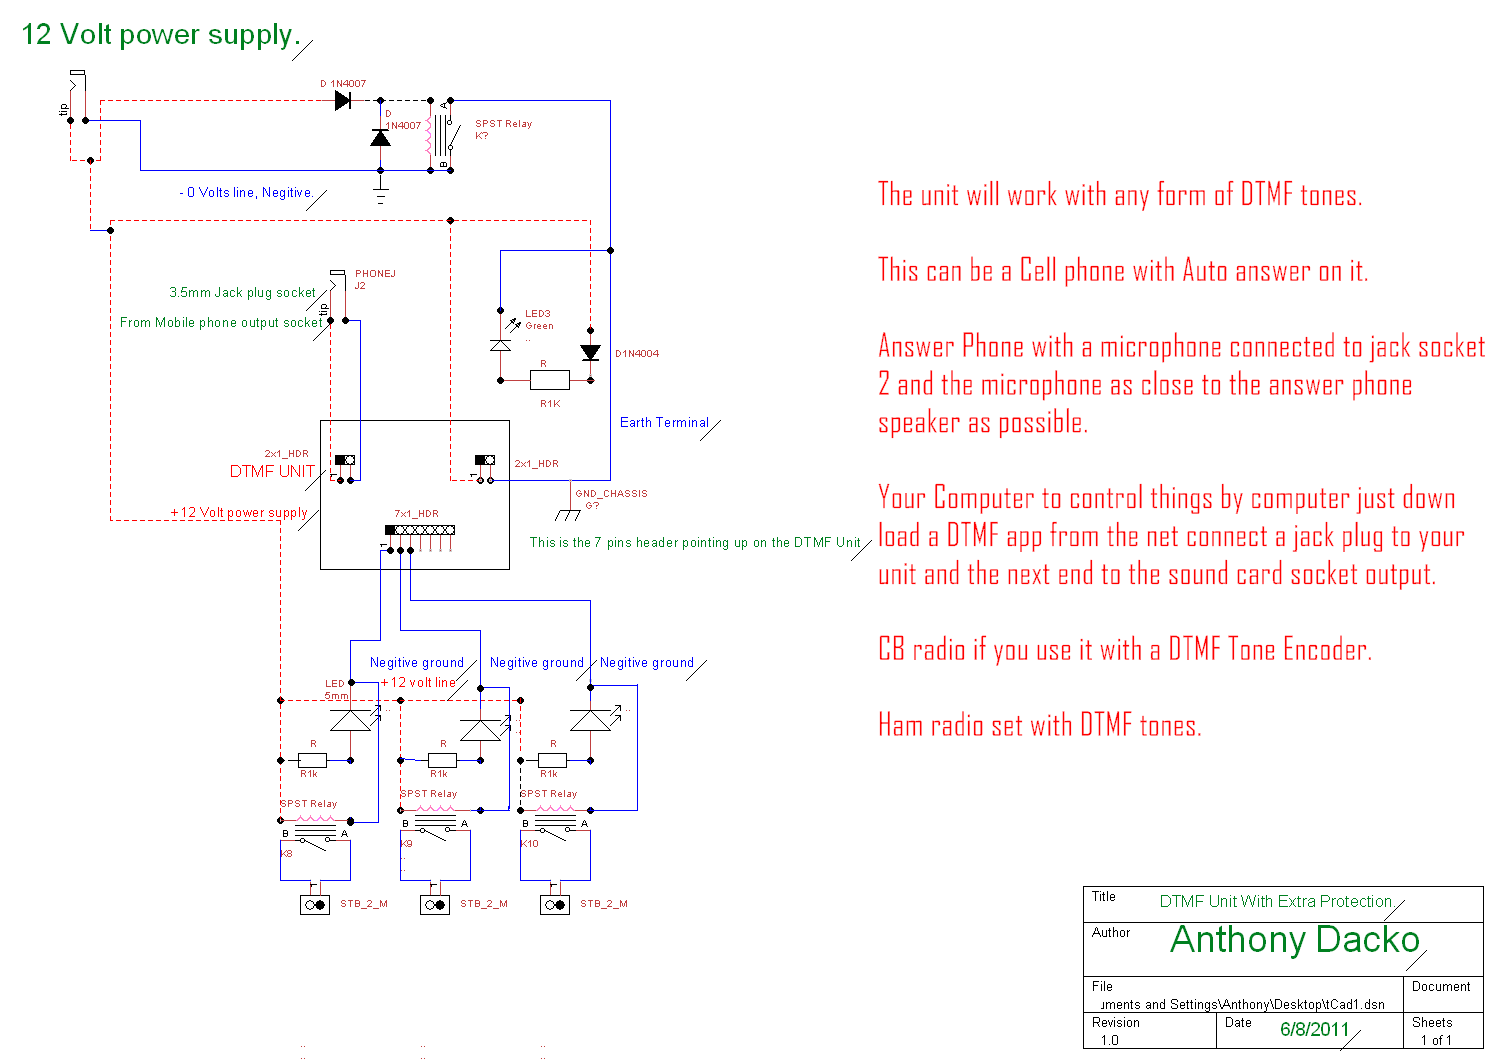
6). When you get every thing
connected up we will now look at how we can send a DTMF code to the unit to turn
on the relays you want see below.
7). Please note I have only tested
this unit with a Nokia 1208 Mobile phone as the receiving phone and the unit works
every time with this phone.
8). You will need to look in your
own phones manual to see how to set up Auto Answer for your model of phone.
9). I often use a Nokia 3310
or my Samsung D500 Mobile phone to send
my DTMF tones how this works is I phone my Nokia 1208 mobile with the DTMF unit
fixed to it and listen for the ring tones to stop this is about 4 rings.
10).Then I key in the
channel I want
to turn on or off by using the codes below.
Now the following information below is how to operate the unit.
Code sequences *11# through to *18# turn on the corresponding relay
Code sequence *10" turns on all relays
Code sequences *01# through to "*08#" turn off the corresponding relay
Code sequence *00# turns off all relays
Codes *?9# through *?D# are ignored.
WITH CODE: FOR EXAMPLE SECURITY CODE 2108
Code sequences *210811# through to *210818# turn on the corresponding relay
code sequence *210810# turns on all relays
Code sequences *210821# through to *210828# turn off the corresponding relay
Code sequence *210820# turns off all relays
Codes *?9# through *?D# are ignored.
Sensitivity 100 MV PP.
Any problems you can E-Mail : Anthony@anthony-dacko.net